SSO/SAML Configuration
Milou supports Single Sign-On (SSO) using the Security Assertion Markup Language (SAML 2.0) standard. This allows users in your organization to authenticate to Milou using your existing Identity Provider (IdP), streamlining access, improving security by centralizing user management, and enhancing user experience.
This guide will cover the general principles and steps for configuring SAML SSO with Milou. For specific instructions related to your IdP (e.g., Okta, Azure AD, Auth0, Keycloak, ADFS), you will need to consult your IdP's documentation alongside this guide.
Microsoft Entra ID
Microsoft Entra ID (formerly Azure AD) is an identity provider for Single Sign-On integration. Below are the specific steps to configure Entra ID for use with Milou:
Prerequisites
- An active Azure account with permissions to manage Microsoft Entra ID applications.
- Admin access to your Milou instance to configure SSO settings.
Step 1: Register a New Application
-
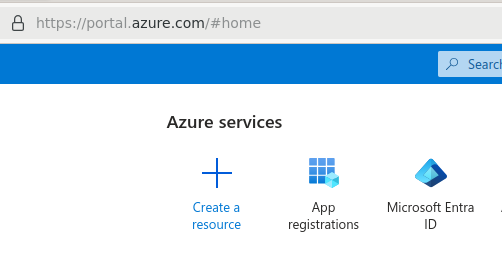
Log in to the Azure portal (https://portal.azure.com/) and navigate to Microsoft Entra ID.
-
In the left-hand menu under "Manage," click App registrations.
-
Click + New registration.
Step 2: Configure Application Details
-
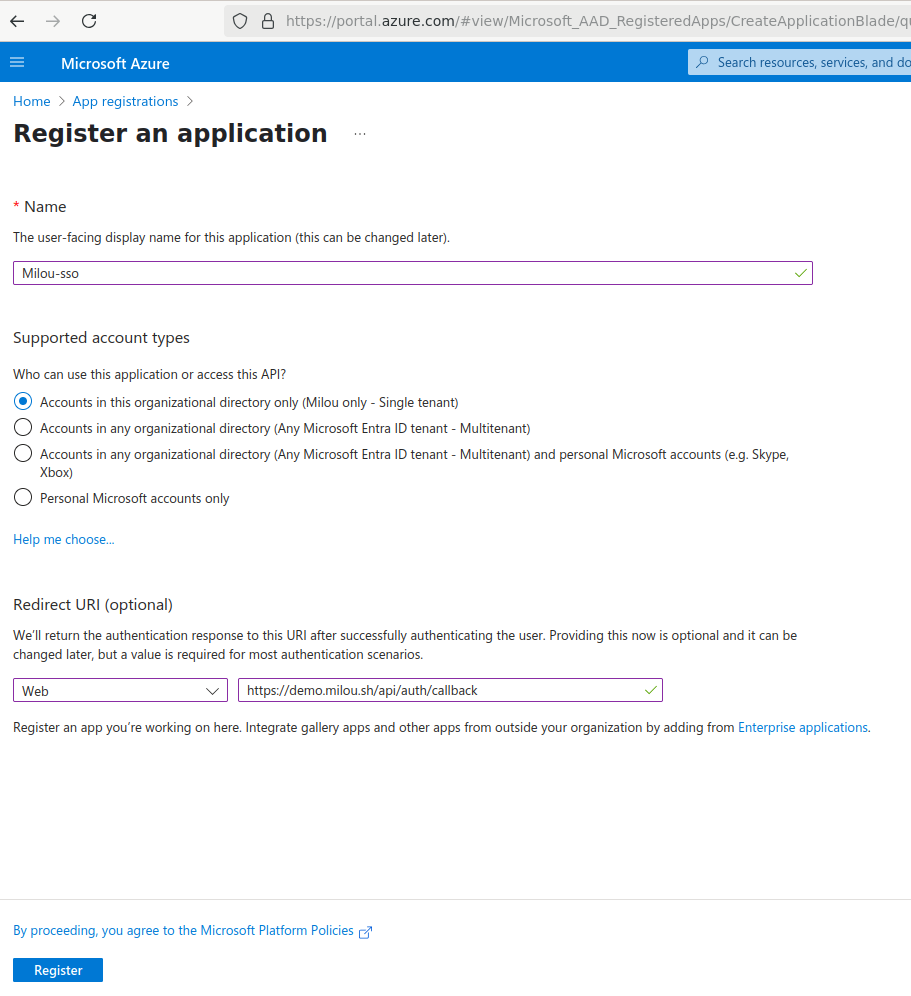
On the "Register an application" page, provide the following details:
- Name: Enter a user-friendly name for this application (e.g., "Milou SSO"). This is how the application will be identified in Azure.
- Supported account types: Choose "Accounts in this organizational directory only".
- Redirect URI:
- Select Web from the dropdown menu.
- Enter the callback URL for your application. This URL is your application's domain followed by a specific callback path. It should be:
YOUR_BACKEND_URL/api/auth/callback(ReplaceYOUR_BACKEND_URLwith the actual base URL of your backend service, e.g.,https://milou.example.com). Ensure this matches the URL configured in the application's SSO settings.
-
Click Register.
Step 3: Get Application (Client) ID and Directory (Tenant) ID
-
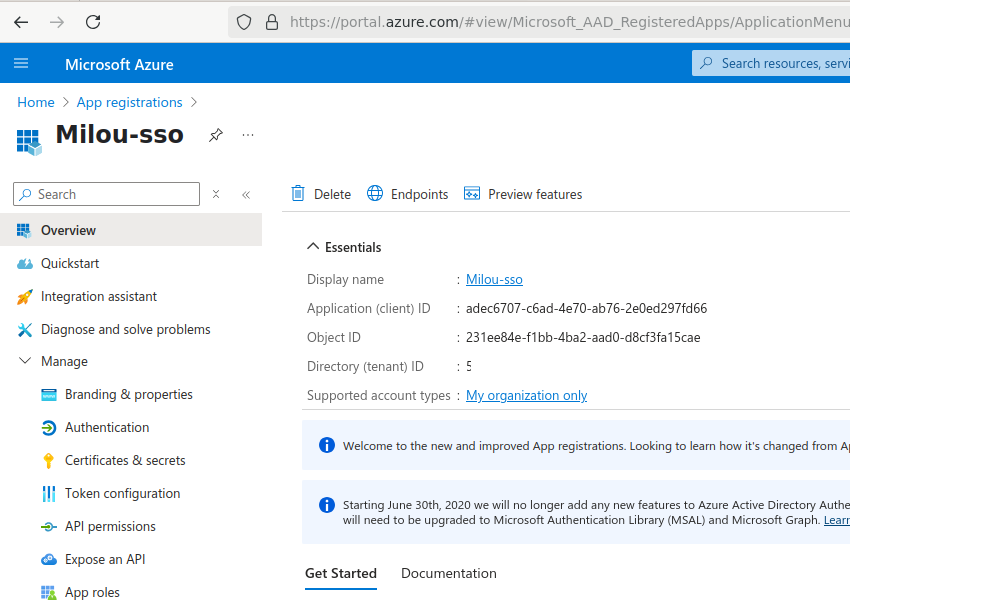
After registration, you will be taken to the application's Overview page.
-
Locate and copy the Application (client) ID. Save this ID securely.
-
Locate and copy the Directory (tenant) ID. Save this ID securely.
-
You will need both IDs for the Milou configuration.
Step 4: Create a Client Secret
-
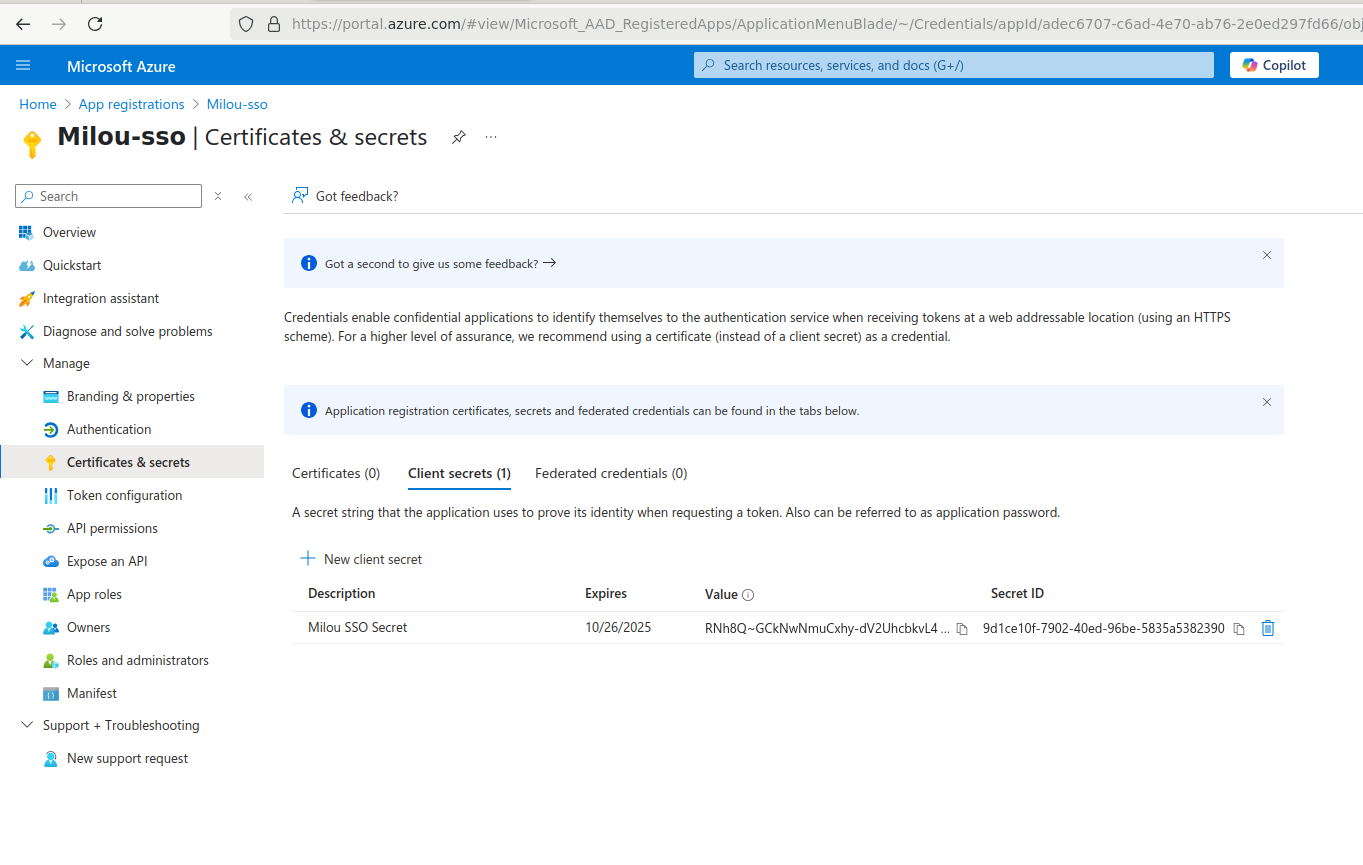
In the left-hand menu under "Manage," click Certificates & secrets.
-
Under the "Client secrets" tab, click + New client secret.
-
Enter a Description (e.g., "Milou SSO Secret") and select an Expires duration for the secret. Note: You will need to renew the secret before it expires.
-
Click Add.
-
Important: Immediately after creation, the secret Value will be displayed. Copy this value and save it securely. You will not be able to view it again after leaving this page. This is the Client Secret required for the Milou configuration.
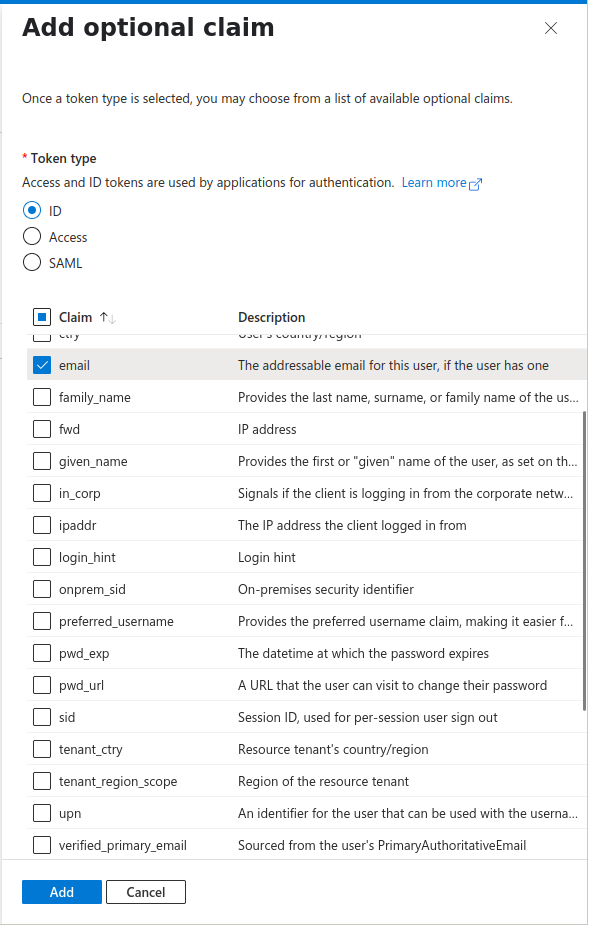
Step 5: Configure Token Claims
To ensure the user's email address is included in the token sent to Milou:
-
In the left-hand menu under "Manage," click Token configuration.
-
Click + Add optional claim.
-
For the Token type, select ID.
-
From the list of claims, check the box next to email.
-
Click Add. Confirm if prompted to add the claim to the access token as well.
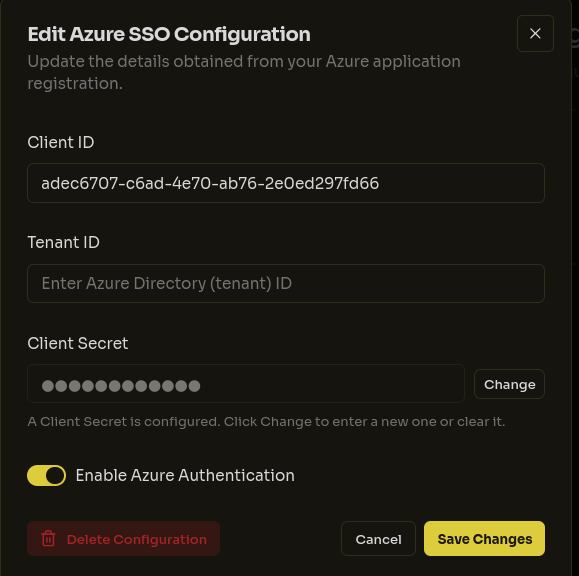
Step 6: Configure Milou with Azure AD Details
Once you have completed the steps in Azure AD, you will need the following information to configure SSO within Milou's admin settings:
- Directory (tenant) ID: Copied in Step 3.
- Application (client) ID: Copied in Step 3.
- Client Secret Value: Copied in Step 4.
Navigate to Milou's Admin Settings > Authentication > SSO/SAML Configuration and enter these values into the corresponding fields for Azure AD configuration. Ensure the provider is enabled.
After entering all required information, click the "Save Configuration" button. Milou will test the connection to Azure AD, and upon successful authentication, will save your configuration. A success message will appear confirming that SSO has been properly configured:
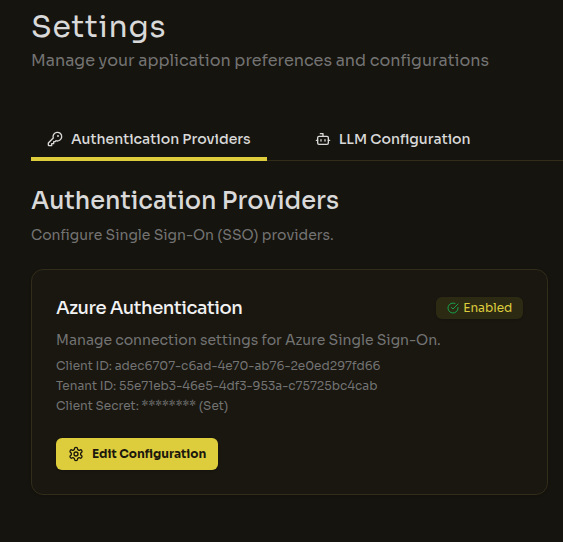
Users should now be able to log in using the "Sign in with Azure" (or similar) button.
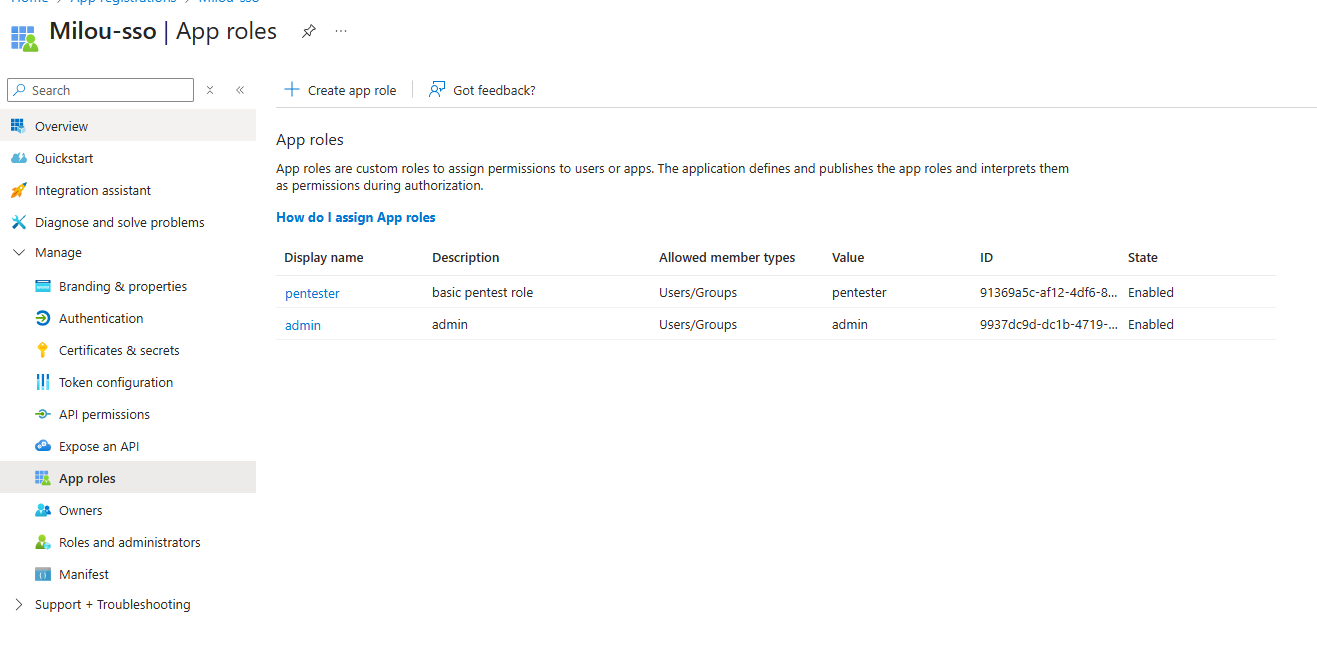
Step 7: Configure App Roles (Recommended)
Milou uses Azure App Roles to automatically assign permissions to users when they log in via SSO. If a user is assigned a role in Azure that matches a role in Milou, they will inherit that role's permissions.
By default, Milou comes with two key roles:
- admin: Full system access.
- pentester: Access to assessments, clients, and templates.
To set these up in Azure:
-
In your Azure App Registration, navigate to App roles in the left menu.
-
Click + Create app role.
-
Create the admin role with the following settings:
- Display name: Admin
- Allowed member types: Users/Groups
- Value:
admin(This MUST match the role name in Milou exactly) - Description: Administrator role
-
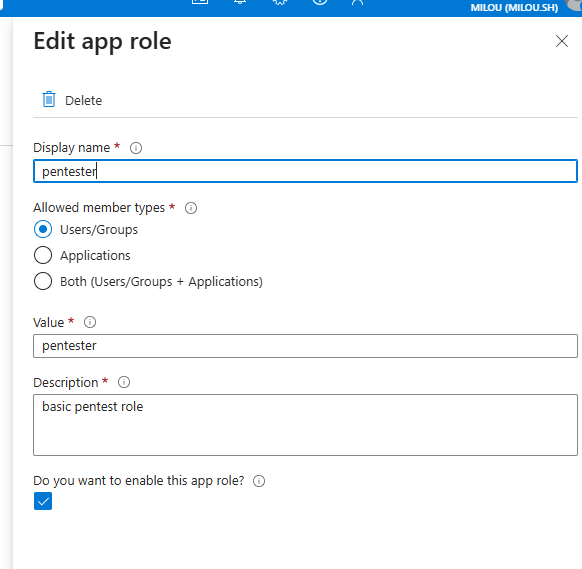
Create the pentester role:
- Display name: Pentester
- Allowed member types: Users/Groups
- Value:
pentester(This MUST match the role name in Milou exactly) - Description: Pentester role
-
Once created, you can assign these roles to users or groups:
- Go to Enterprise Applications (not App registrations) > Your Application > Users and groups.
- Click + Add user/group.
- Select the user or group.
- Select the role you just created.
You can also create custom roles in Milou (under Settings > Access Control > Roles) and map them in Azure by creating a corresponding App Role with the same Value as the role name in Milou.
Next Steps
Once SSO/SAML is configured and tested, your users can enjoy a more seamless and secure authentication experience.
- Return to the Instance Configuration Overview for other settings.
- Explore User Guides to learn more about using Milou.